Category Archives: Computer

Retro Computing: How to boot strap a Commodore 64 system using direct audio signal injection.


Before proceeding, beware that you have other option like SD2IEC or using X1541 cable and a PC and using a Tape adapter method.

I am doing this just out of pure boredom and wanted to test and see if this idea would work and only have C64 with blanks disks and no softwares.

I start with a Commodore 64 with one floppy drive, a Commodore C2N cassette tape and a box of 10 floppy disks.

First order of business was to format a floppy disk to store transferred utilities program using the following commands:

OPEN 15, 8, 15,”N0:UTILITIES,01″ : CLOSE 15

The first program that you need to transfer across is a file copy utility called Copy 190, it will simplify file transfer later on.

I will use Vice to run the “Copy 190” program to copy itself on to a tape image and then use audiotap to convert it to a wave file.

To create the diskette image wave file:

  • Start C64 emulator and attach “Copy 190” disk image with autostart
  • Then select Disk to Tape option. Then enter “Copy 190” and follow the instructions.
  • When prompted to insert destination tape. Use the file menu to create a tape image called “copy 190.tap”
  • And select N when seeing Turbo (Y/N) prompt.
  • Then use audiotap to convert to a wave file.
  • Then use music player to record it/transfer.
  • On C64 type LOAD “Copy190”, 1


My first attempt using a hand held tape recorder failed miserably due to noisy tape recorded on a Walkman and miss-matched playback speed.

After so many failures, I finally abandon this method and resort to direct signal injection from PC headphone output to the tape input preamp.

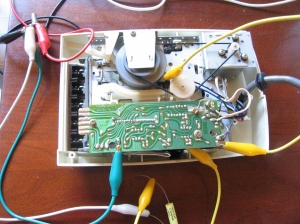
So, with a 10K pot and .1uF capacitor and a few alligator clips later and hardwired the tape tape sensor.

I managed to load run Copy190 on C64. From then on using the same setup to transfer downloaded software onto the diskettes using tape to disk copy option.

The trick is start with low volume and adjust the pot or increase the volume until you successfully load from tape. You have to monitor the tape player motor and pause the WAVE audio player when it stop and resume when it start spinning again.

Good luck!

C2N Cassette Mod

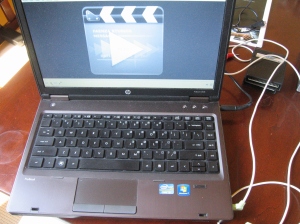
IMG_0168 IMG_0169


TRS 80 Model 100 Cassette Interface Cable for PC


At the time when I was about to replace TRS 80 Model 100 NiCad Battery. I have a few programs on it that I need to make a backup of before replacing the battery.

I don’t have a null modem cable or any other means of saving the data.

So, I went a head and created a custom cable to record these backup using my laptop through the Mic input and Audacity program. With this cable, it’s also possible to record program on these cheap MP3 recorder using the Mic input as well.

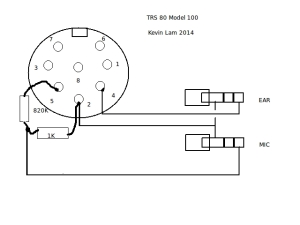
Below is a drawing of the cassette interface which use a simple voltage divider to reduce the line audio to a level which is suitable for laptop Mic input.

TRS80Model100Cassette

To capture a recording, press record on Audacity and type in the following command on the laptop to begin saving the program.

save “cas:alien.ba”

To reload the program, type in the following command on the laptop and press play on Audacity.

load “cas:alien.ba”

Common Loading Problems

  • A weak, noisy recording in the recorded audio might cause loading problem. This is because most vintage cassette interface use zero crossing detection circuit to detect 0 or 1 by counting number of crossing in given period. Any noise introduced in the audio might cause false reading. In case of weak signal, increase the volume and most of the time it would fix the problem. If the recorded audio is noisy, try disconnecting the power adapter on TRS 80 Model 100 and run it on battery to reduce hum.
  • If you’re recording in stereo, make sure the channel that feed the ear input has audio. Otherwise switch the channel or record in mono instead. Alternatively connect the ear input to both left and right channel.
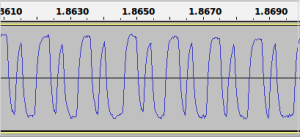
  • If you are still having problem with loading, use Audacity to zoom in and look at the recorded audio. Ensure that the recording is not clipping and audio signal is utilizing the entire range. Otherwise increase Mic sensitivity or adjust the resistor ratio to increase the Mic input level. Below is a decent sample of good recording.

Screenshot-2

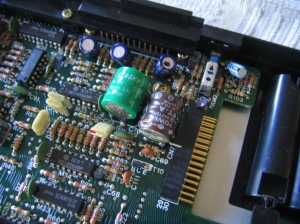
Replacing TRS 80 Model 100 rechargable NiCad CMOS battery.


I have a TRS 80 Model 100 and while doing a routine maintenance. I noticed the internal NiCad is showing sign of crystal forming. Before allowing it to leak and destroying the PCB, I ordered a 3.6V 60mA NiCad replacement from eBay to replace it.

I was planning to remove PCB to do it properly, however after the cover was removed. It seem like it can be done without removing the PCB.

Using the 40W solder iron, I heated each leg of the NiCad battery from the top side and gently removing each leg. Then I used the solder wick to clean up the solder points and install the new battery in it place. Afterward, re-solder each leg with sufficient heat to ensure  proper bonding.

Once everything is put back together, hook it up to external power adapter and let it charge. Now unless, one of these electrolytic capacitors start failing. It should extend the life of this laptop another 5+ years.

IMG_0017

Display a pop message at the end of a cron job.


Traditionally, when a cron job is finished. You will get a nice email indicating of its status.

Lately, I am quite annoyed by the amount spams that I am getting.

On my Linux laptop, I had it configured with a few cron jobs running in the background monitoring other activities.

Lately, it just flooding my in-box with messages and becoming unmanageable and hard to keep up.

Since, I am only interested to know if something interesting had occurred. There must be a better way than flooding my in-box with emails.

After, some research I found that the notify-send is included with every Linux-Mint installation. It’s quite simple to use and quite customizable and fit the bill perfectly.

Below is a sample on how to use it:

          notify-send –icon=/usr/share/icons/Mint-X/apps/48/gnome-gnibbles.png –expire-time 30000 ‘Oppa’ ‘You do have a life after work! So, go home!’

Free Online Virus Scanner


If you’re a vintage computer collector or someone enjoy using old computer like me. Once in a while you might, in inadvertently downloaded softwares from a questionable source which may contain virus/worm.

Overtime, I have taken many precautions to avoid such problem.  But, the idea of having to buy Virus scanner software and pay yearly subscription fee to me is ridiculous.

A better solution I found is to use a free on-line virus scanning services which will use multiple virus scanners to look for potential virus or worm.

Once such service, I found is https://www.virustotal.com, you simply upload the file in question and after while you will get the scan status report. After which you can rest assure the file virus free.

Scheduling Linux laptop to suspend and re-animate at scheduled time.


I recently created an automate script which search the internet for certain items and email me the search results. It’s currently running on HP Probook and I don’t want to leave the laptop running indefinitely.

So, I created a cron job to run this script to automatically suspend the laptop when there are no interactive user using the system. The script use rtcwake command to suspend the system in memory and it seemed to work pretty nicely.

To use this script, login as root and saving the following to a file /root/scripts/hybernate

#!/bin/bash
SLEEP_DURATION=1800
if [ $# -gt 0 ]; then
SLEEP_DURATION=$1
fi

# Put the laptop to sleep, if no interactive login and wake up later
if [ `who | wc -l` -eq 0 ]; then
/usr/sbin/rtcwake -m mem -s $SLEEP_DURATION
fi

Change the script permissions:

chmod 755 /root/scripts/hybernate

Then add the following line to root crontabs:

# m h dom mon dow command
* * * * * /root/scripts/hybernate 1800 2>/dev/null

Handmade 8K Static RAM for Commodore VIC 20


Today I spent sometime cleaning up and reorganizing the garage. I accidentally unearthed an old artifacts which brought back many good memories of my early computing years.

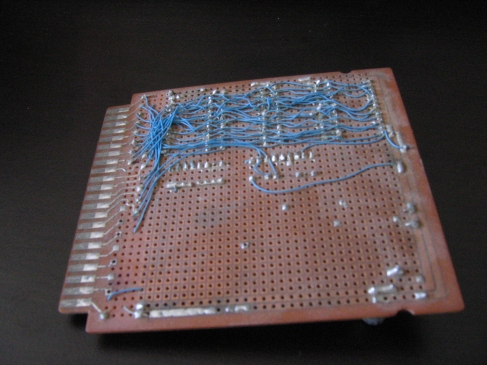
As pictured, the 8K static RAM expansion adapter was made from 4 x 6116 (2K x 8 ) statics memory chip for my Commodore VIC 20. It was my personal home PC back then, before moving to C64, Amiga 500 and finally PC Clone. 🙂

I recalled that I spend one weekend morning during my high school year, wiring them all up using point to point wiring technique. These memory chips were quite expensive back then. I’ve to beg for more allowance and saved just enough to able to buy those chips and related parts.

As you can see, I didn’t use wire wrapping sockets just to keep the down cost.

ImageImage

Now with the additional whopping 8K RAM, the possibility are endless. 🙂

I recalled spending endless hours entering thousand lines of hex codes each month for new games and programs published in printed magazine article.